The very first time you open GnuCash, you will see the Welcome to GnuCash! dialog. From there, GnuCash provides other tools to help you easily find what you are looking for. Let's take a look at some of the common screens and dialog boxes you will see.
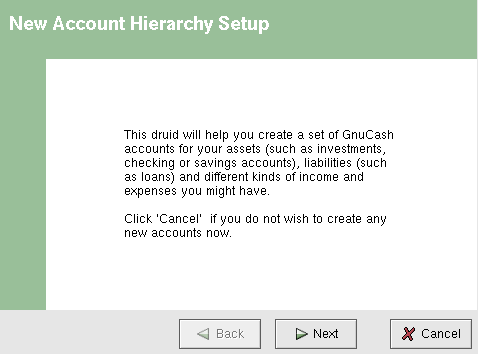
The New Account Hierarchy Setup druid allows you to create several accounts at once. When you open GnuCash the first time, you will get this dialog:

This image shows the first screen of the New Account Hierarchy Setup Druid.
Click Next and follow the instructions provided in the dialog. The dialog provides a default set of accounts with predefined account types, and you simply select the accounts you want. For more information on account types, see section 3.2.
If you intend to import your data from another program and you want to keep the same account names you used in that program, you may want to delay setting up default accounts at this time. You can simply import the data and the account names into GnuCash from the other program (Section 2.7 explains how to do this).
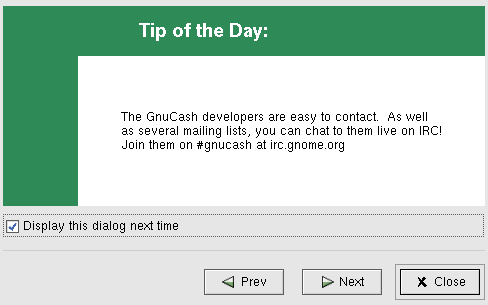
GnuCash provides a Tip of the Day dialog to give helpful hints for using the program:

This image shows the Tip of the Day.
These tips provide useful information for beginning users. To view more of the tips, click Next to continue. If you do not wish to see this dialog box on startup, deselect the box next to Display this dialog next time. When you have finished viewing the helpful tips, click Close to close the Tip dialog.
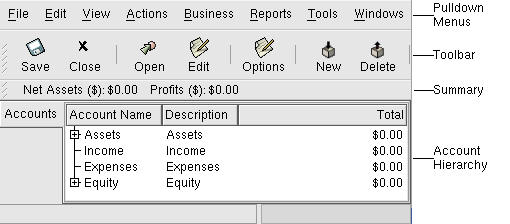
You should now see the Accounts window, which appears as shown below. The exact layout of the account tree will depend on which default accounts you selected during the New Account Hierarchy Setup. In this example, the "Simple Checkbook" accounts are shown.

This image shows the Accounts window.
The Account Tree window provides an overview of the data contained in the current file. It contains a list of account names and their current balances. From this window, you can open any of the accounts. The individual account windows are called account registers. GnuCash allows you to have as many account registers open as you wish.
At the top of this window is the title bar, which displays the file name (once you have saved the file.) Below that is the menu bar. You can access the menu options by either clicking on these menu headings or by using shortcut key combinations, covered later in this chapter. Next is the tool bar, which contains buttons for the most common functions. Below that is the status bar, which tells you information about what you own (Net Assets) and how much money you have made (Profits).
The account tree appears below the status bar. Once you have started creating accounts, the account names will appear in the account tree. You can customize which headings show up by using the Options button.
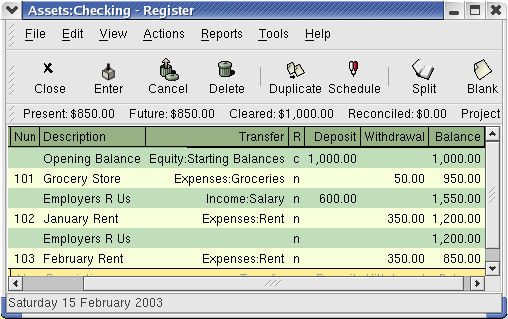
The Account Register windows are used to enter and edit your account data. As the name suggests, they look similar to a checkbook register. When you double-click an account name in the Accounts window, the Register window for that account will open.

This image shows The Checking Account - Register with several transactions.
Chapter 4 explains more about account register windows and how to enter data into them. For now, note that the parts of an account register window are similar to the parts of the account tree window described earlier. The title bar at the top contains the account name. Below that, the menu bar contains menu options related to the account register. Tool bar buttons simplify common data entry functions. The status bar appears below the tool bar, and it displays four types of account balances covered in Chapter 4. At the bottom of the account register window, information appears about the current location of the cursor.
Both the account tree window and the account register window contain tool bar buttons. These buttons provide quick access to common functions such as Save and Open in the account tree window and Record and Delete in the account register window. If you are not sure what a button does, move the mouse pointer over that button, and you should see a description of the function appear.
Here is a summary of the account tree window buttons:
Save - Use this function often to save the current file to disk.
Close - Use this function to close the current notebook page.
Open, Edit, New and Delete - These are functions related to accounts. They are discussed in Chapter 3.
Options - This button edits the account view options.
Exit - Closes your GnuCash session.
Register buttons are discussed in Chapter 4.
The account tree window and the account register window both contain menu headings in a menu bar. Clicking on a menu heading brings up the menu items for that heading.
You can click on the account tree menu headings and then move the mouse pointer over the menu items to see what they do. As the pointer moves over a menu item, a description of the item appears in the lower left-hand corner of the window. To select a menu item, click on it.
You can also access the most common menu items in a window by right-clicking the mouse anywhere in that window. In the account tree window, this will bring up a list of account items. In the account register window, this will bring up a list of transaction items.
Other ways of accessing menu items are through keyboard shortcuts, described next.
Most of the menu items have keyboard shortcuts, and these are marked by underlined characters in the menu names. Pressing the Alt key with the underlined character in the menu heading will bring up the menu items for that heading. Once the menu items are displayed, type the underlined character in the menu item to activate it. For example, typing Alt+F in the main window brings up the File menu, then typing S will save the file. A few of the menu items use Ctrl key and function (for example F3 to open a new file) key shortcuts as well, and these are listed next to the items.
GnuCash, as a Gnome application, also allows you to define your own menu shortcuts. To define a shortcut, click on the menu header and move the mouse pointer over the menu item. While the menu item is highlighted, press a key or key combination to set the shortcut. You should now see your shortcut choice next to the item in the menu. To delete a shortcut, press the Delete key while the menu item is highlighted.